Tire Maintenance & Safety
How to Read a Tire Pressure Gauge: A Quick & Easy Guide

Free shipping
Best price guarantee
SimpleCrew exclusive savings
0% APR Financing
Tire replacement coverage
24/7 roadside assistance
Easy returns
Tire Maintenance & Safety
Maintaining proper tire pressure is crucial for ensuring a safe and efficient driving experience. Regularly checking your tires with a reliable tire pressure gauge can help you avoid potential issues and prolong the life of your tires.
A tire pressure gauge is an essential tool that every vehicle owner should have in their arsenal. It allows you to quickly and accurately measure the air pressure in your tires, ensuring they are properly inflated for optimal performance.
Investing in a quality tire pressure gauge and learning how to use it correctly can save you money in the long run by improving fuel efficiency and preventing premature tire wear. In this article, we'll dive into the world of tire pressure gauges and provide you with the knowledge you need to keep your tires in top shape.
A tire pressure gauge is a small, handheld device designed to measure the air pressure inside your vehicle's tires. It consists of a pressure-sensitive mechanism connected to a display that shows the pressure reading in pounds per square inch (PSI) or bars.
Maintaining proper tire pressure is essential for several reasons:
There are three main types of tire pressure gauges available on the market:
When choosing a tire pressure gauge, consider factors such as accuracy, durability, and ease of use. Look for gauges with a wide pressure range (usually between 5 and 100 PSI) to accommodate various vehicle types. It's also a good idea to read tire pressure gauge reviews to find the best options for your needs and budget.

Using a tire pressure gauge effectively involves a few clear steps. Start by choosing the right gauge—digital, analog, or pencil—to match your preferences and needs. Understanding its operation ensures precise readings every time.
If adjustments are needed based on the gauge reading:
Checking tire pressure with a gauge is an essential part of car maintenance that ensures your vehicle runs smoothly and safely. By mastering this simple task, you can help maintain the longevity and performance of your tires.
Selecting an appropriate tire pressure gauge is integral to ensuring precise tire maintenance. The variety of gauges available caters to different needs and preferences, making it essential to understand their distinct features for an informed choice.
Gauges come in several forms, each with unique benefits. Digital models excel in delivering clear, precise readings with the convenience of features like backlit screens and battery-saving auto-shutoff functions. These gauges are ideal for those who value accuracy and modern technology.
Dial gauges, often preferred for their durability, provide a mechanical needle display. They are straightforward and reliable, appealing to those who appreciate a tactile, durable tool. Compact and portable, stick gauges are perfect for quick, on-the-go checks, displaying readings on a simple sliding scale.
As you choose a gauge, focus on the following:
By evaluating these aspects, you align your choice with both your technical needs and personal preferences. Whether you prioritize modern features, classic design, or convenience, the right tire pressure gauge will help maintain your tires effectively and ensure your vehicle runs smoothly.
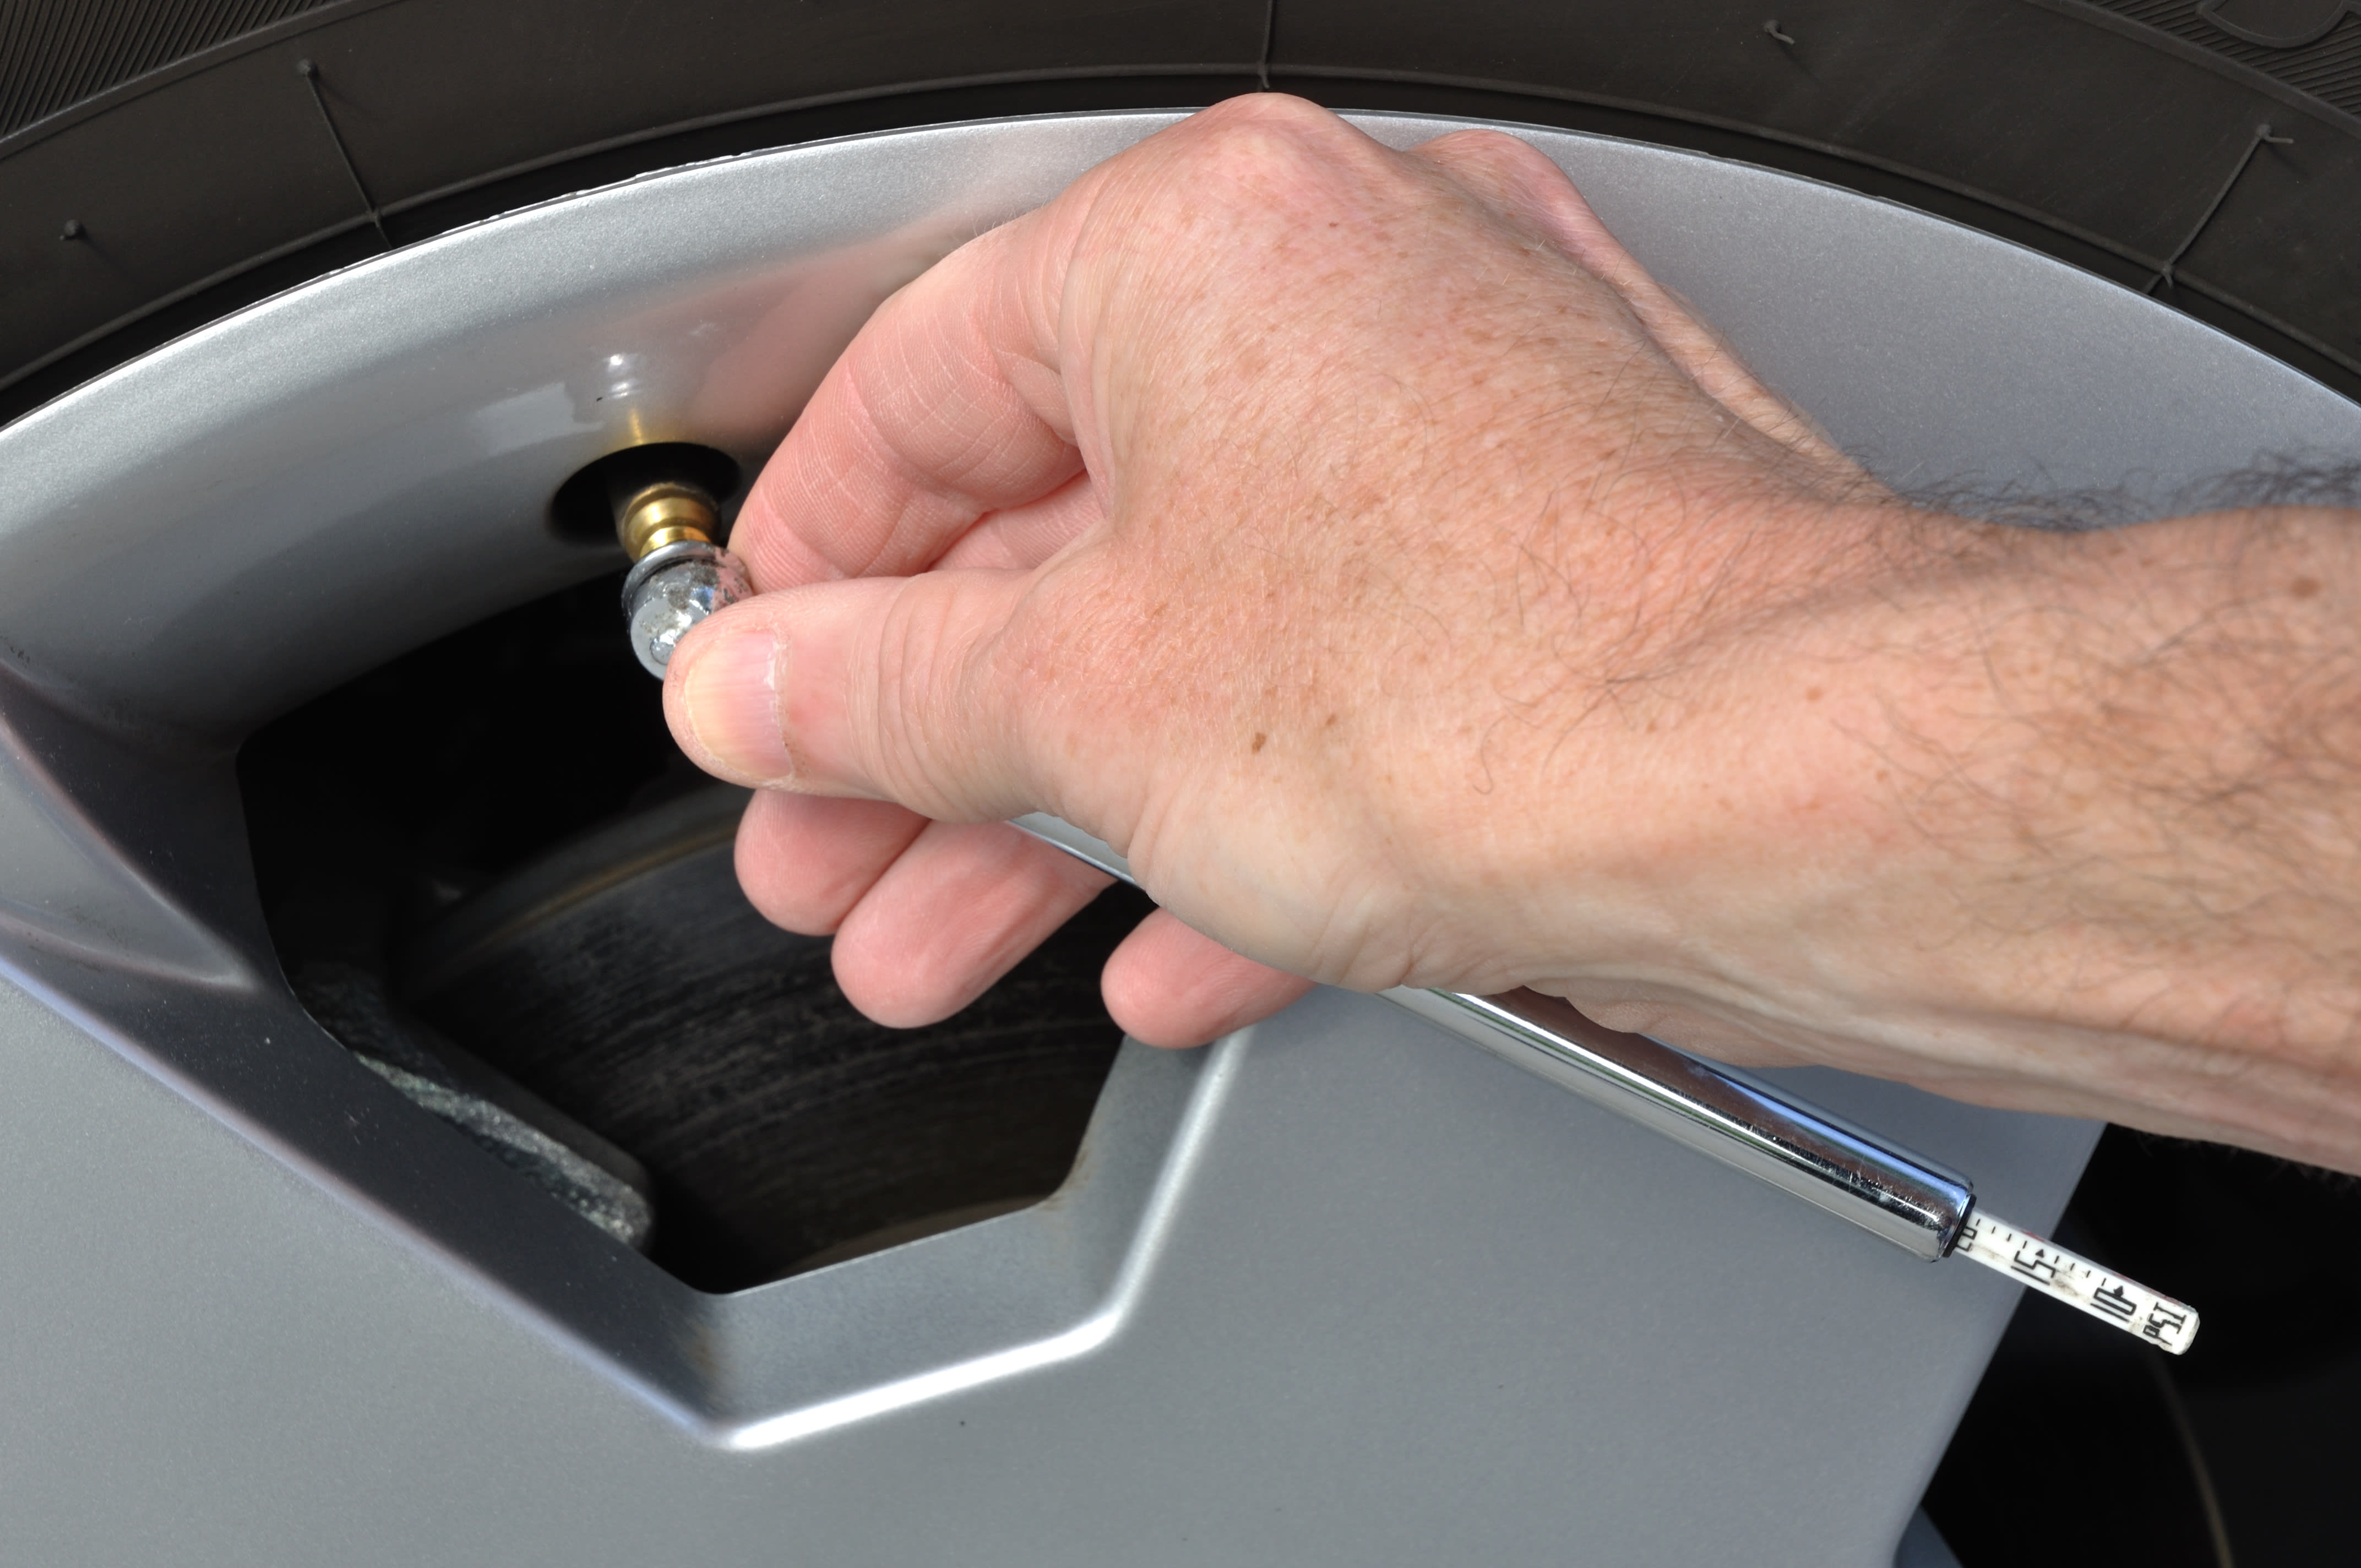
Accurately finding the tire's valve stem is essential for measuring tire pressure. This small but vital component acts as the entry point for both inflating the tire and checking its pressure. Proper identification and preparation of the valve stem are key to obtaining precise pressure readings.
By taking these steps to prepare the valve stem, you enhance the chances of an accurate tire pressure measurement. This meticulous approach supports vehicle safety and performance, ensuring your tires remain in optimal condition.
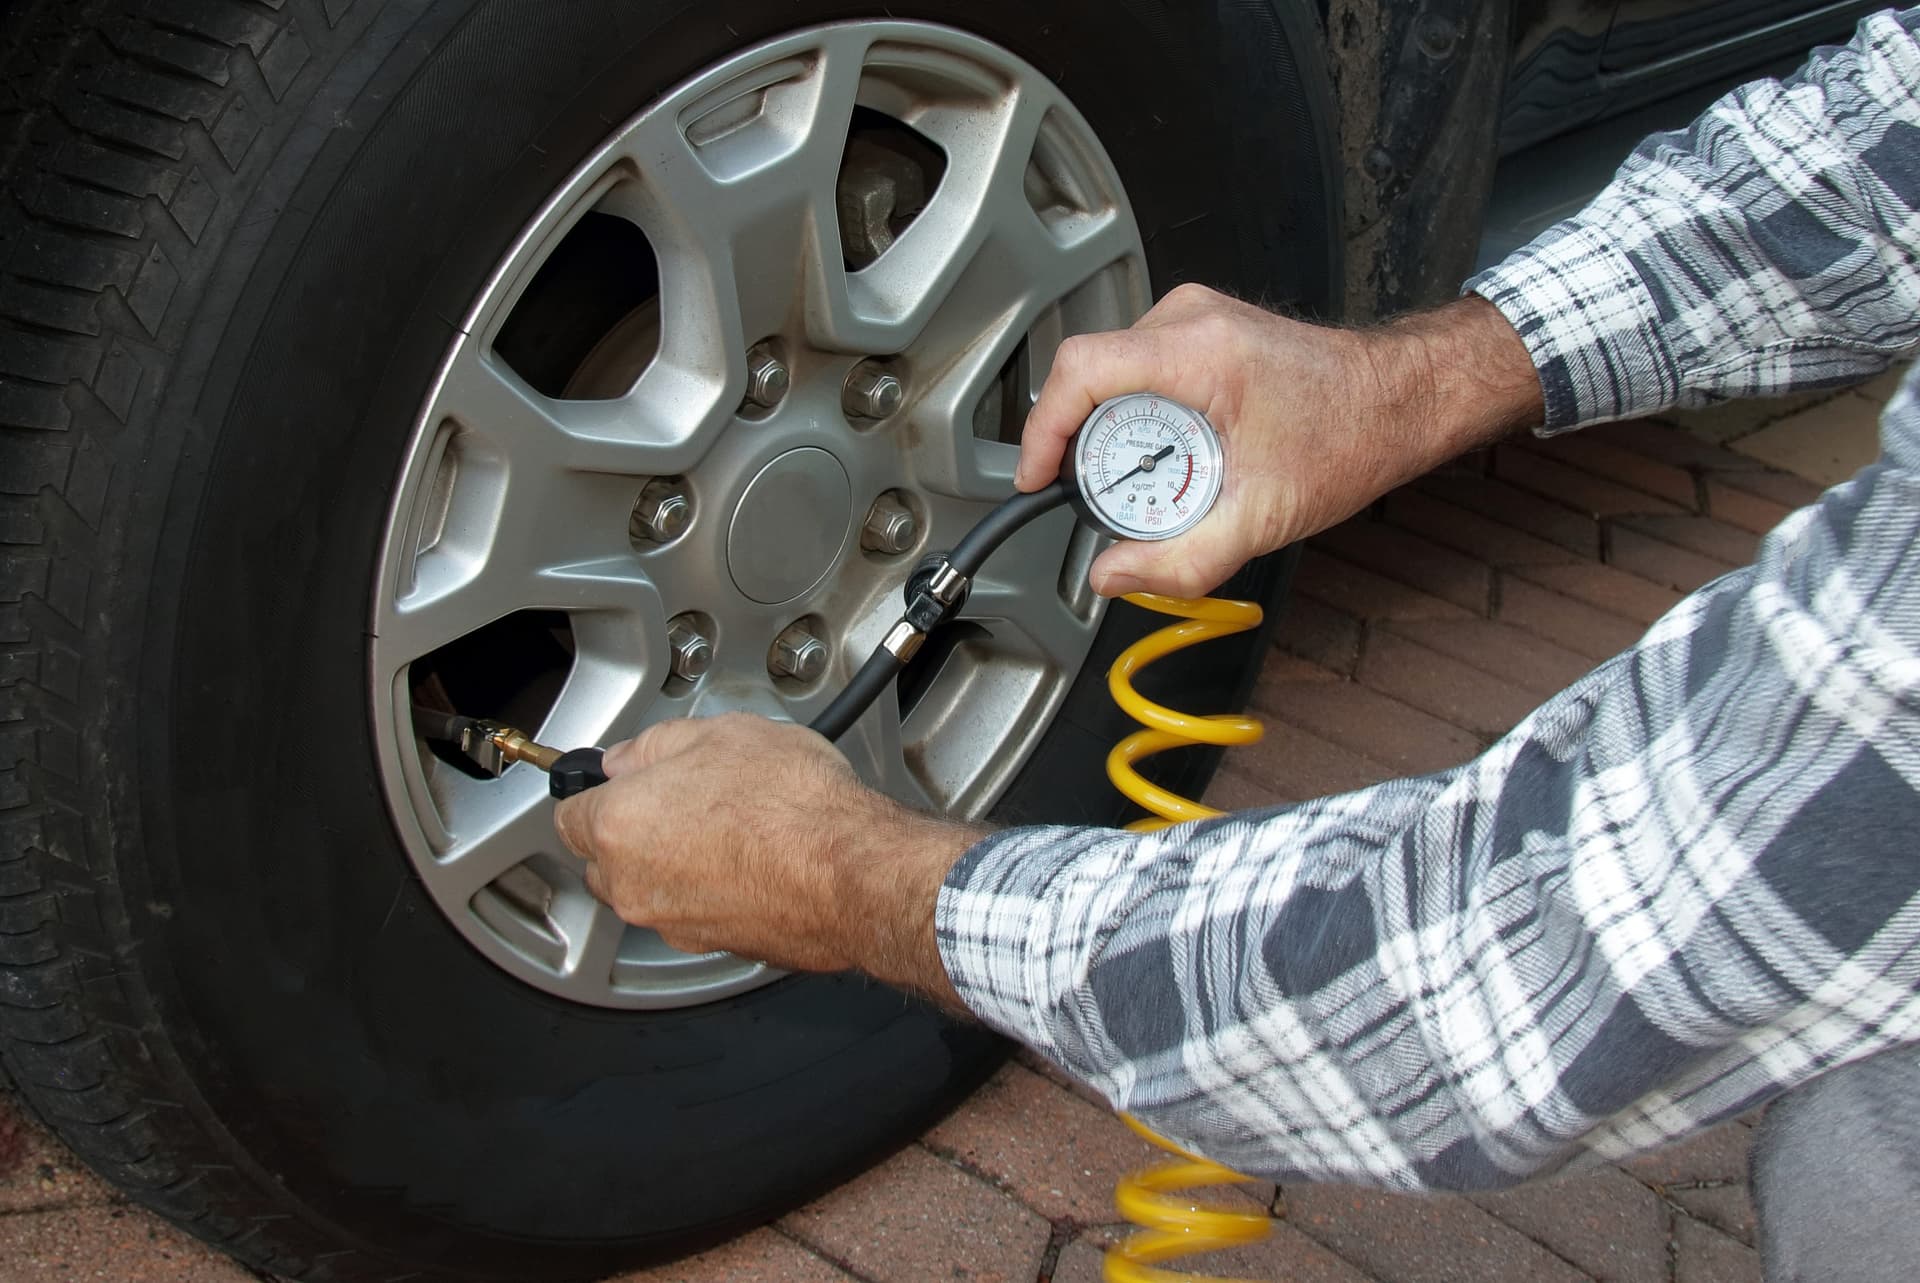
Attaching the tire pressure gauge correctly is crucial for securing an accurate reading. The procedure requires a precise and stable connection between the gauge and the valve stem to prevent air loss during measurement.
With the gauge properly attached, focus on the display or indicator for the pressure reading. Digital gauges provide an immediate numerical display, while analog and pencil types use mechanical indicators.
Maintaining focus and ensuring a tight connection during this process guarantees an accurate measurement, which is vital for tire performance and safety.
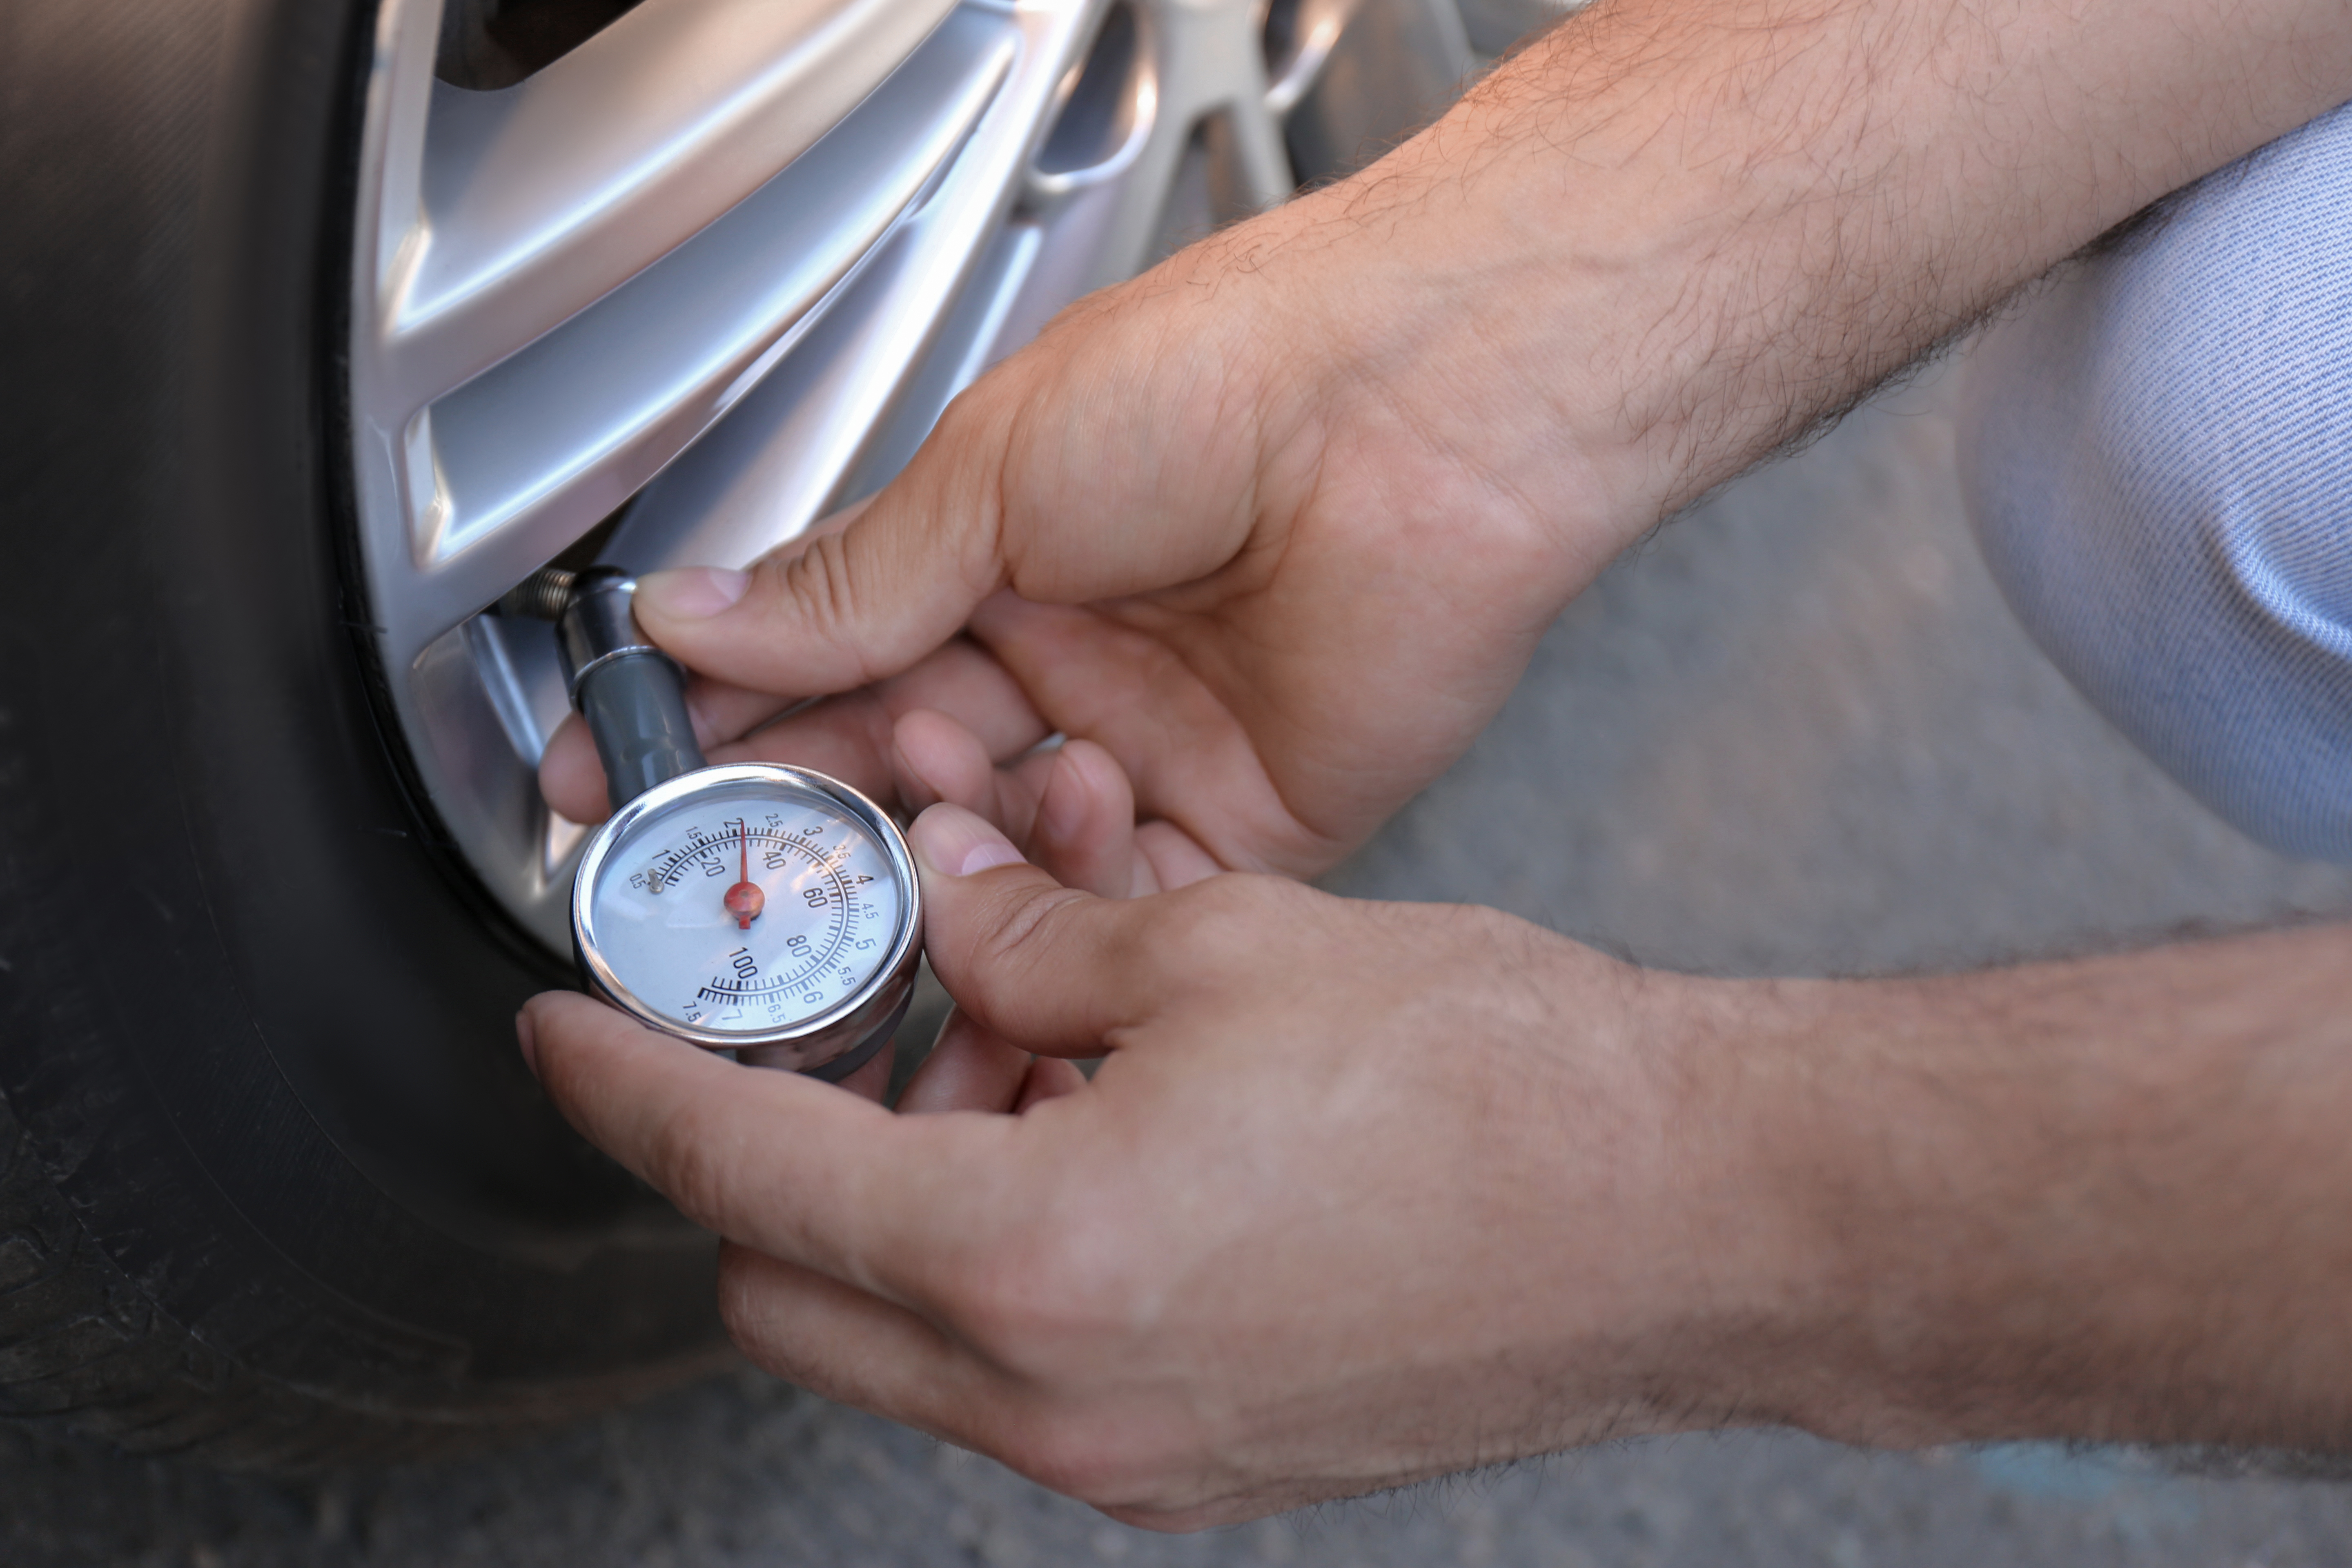
After securing the gauge to the valve stem, focus on interpreting the data it provides. This step is crucial for confirming that your tires are inflated correctly, which plays a significant role in the safety and efficiency of your vehicle.
Once you've obtained the pressure reading, it becomes essential to cross-check this value against the optimal tire pressure specified for your vehicle. You can usually find these specifications in the owner's manual or on a sticker located on the driver's side door jamb. Aligning the tire pressure with these guidelines guarantees not only safe driving but also optimal fuel efficiency and tire durability.
By systematically interpreting and cross-referencing your tire pressure readings, you ensure that your vehicle operates at its best, enhancing both performance and longevity.
Once you've determined the current tire pressure, the next step involves making necessary adjustments to align with recommended levels. Both overinflated and underinflated tires can lead to complications, affecting your vehicle's handling, safety, and fuel efficiency.
If your gauge shows that the tire pressure is below the manufacturer's recommended level, you'll need to increase it. Utilize a dependable air compressor or inflator for this task. Firmly attach the inflator to the valve stem to ensure no air escapes during the process. As you add air, periodically check the pressure with your gauge to approach the desired level accurately. Steady and gradual inflation will help you achieve precision without exceeding the target pressure.
Should the gauge indicate excessive pressure, it's crucial to release some air. Carefully depress the valve stem's pin using a tool like a valve core tool or the tip of a tire gauge. As air escapes, listen for the sound to ensure it's flowing correctly and intermittently check the pressure to avoid substantial reduction. These small, controlled releases allow you to adjust the pressure back to the recommended level effectively.
By maintaining tire pressure within the specified range, you enhance safety, optimize vehicle performance, and extend tire longevity. Attentively managing these adjustments ensures your vehicle remains prepared for the road, delivering a smooth and reliable driving experience.
Following the adjustments to your tire pressure, it's vital to ensure everything is set correctly. Reapplying the gauge to each tire will verify if the pressure aligns with the ideal specifications. This consistent verification helps maintain optimal tire conditions.
Incorporating regular pressure checks into your routine is essential for vehicle maintenance. By doing so:
By integrating these practices into your routine, you ensure that your vehicle remains ready for any journey, maintaining both performance and safety.
By mastering the art of using a tire pressure gauge, you can ensure your vehicle's tires remain in optimal condition, enhancing both safety and performance. Remember to make tire pressure checks a regular part of your maintenance routine to extend the life of your tires and keep your vehicle running smoothly. When it's time to replace your tires, shop for tires online with us and find the best deals to keep you rolling with confidence.
You can read a tire pressure gauge by pressing the gauge’s head against the tire valve. For instance, your reading will be 34 PSI if you attach the gauge to your tire and the rod extends to a large 3 and a small 4 then your reading is 34 PSI in a pencil gauge. For a dial gauge, the needle will stop at your PSI reading. For a digital tire pressure gauge, turn it on and and press it against the tire’s nozzle to get an accurate reading.
You can check tire pressure with a gauge by locating the tire valve and firmly pressing the gauge against the valve to get a reading. Make a note of the number that the gauge is providing, and compare it to the recommended tire pressure that can be found on the vehicle’s door jamb or within the owner’s manual.
Search By